In the past few months I have been working staidly towards building a HERMS system. It took a while, but I finally got together all the components I needed, and I was finally going to assemble it over the next couple of weeks when SWMBO and the Junior Brewmistress are away visiting relatives in the States. So naturally, now that I'm all ready, I'm re-thinking the whole idea of building a new system.
See, I decided to build a HERMS system after I saw one on a fellow-brewer's rig. At the time I was brewing BIAB with a bag that really was not suited for the part. I had all kinds of problems with efficiency, mash temperature, and recipe balance, and I thought that a system where you set it to the right settings and forget about it sounded fantastic. My decision came to fruition when I switched from BIAB to a cooler-mashtun, and had to deal with mash temperatures being all wrong without being able to add heat as needed (a major benefit of BIAB).
Since those days, two things have happened that cause me to rethink the HERMS idea:
1. I found out that HERMS isn't all that -. You still have to futz with it to get things to work right. You're dependent on more equipment that can fail on you, and it's generally more complicated. In beer, as in life, K.I.S.S.
2. I've become a much better brewer. - I've gained experience. I've learned my current system. I know what to do in certain situations. A dough-in that ends up too low or high doesn't freak me out anymore. I know what to do in that case. I've successfully dealt with a stuck sparge, calculated water volumes, and had consistent efficiency rates. A lot of those problems that I wanted to use HERMS to solve I ended up solving without.
One might ask: I've already spent all the money to get the components. Wouldn't it be a terrible waste not to build the HERMS now? Well.. Yes and no. In reviewing the various things I got for the system, I think the only thing I will end up not using is the temperature controller. Everything else: The pump, the tubing, the spigots, the electric heating element, I have use for all of it (in fact, with the exception of the pump, I already use all of it in my current system.) Heck, when I set the pump up to do fly-sparge, I might even install the controller inline somewhere to see what the spage water temperature is. Waste not want not. :)
Don't get me wrong, I still think HERMS is massively cool. I like gadgets, and I like fine-tune control, so chances are I will probably build it eventually. But I think that I have not come close to using the full capacities of my current system yet, so rushing to upgrade it seems a little ridiculous. Plus, I think that if I do the build in a year or two, I will have a much better feel for what I'm doing, and a much better understanding of the process, which will lead me to build a better system and, ultimately, make better beer.
Sunday, December 18, 2011
Monday, December 12, 2011
Dry yeast to Liquid yeast table
I had a discussion with a fellow homebrewer some time ago, where he claimed that dry yeast is as good as liquid yeast, and that it can produce equally good beer. I argued to him that it sounded unreasonable to think that you can substitute the dozens of liquid strains available with the handful of dry strains and expect the same results, and in response he sent me to do some reading.
Well I did some reading, and it turns out, we were both right. There are, in fact dozens (if not hundreds) of yeast strains out there. Each differing in flavor profile, attenuation, flocculation, temperature range and other factors, and indeed most of them produce different results (to a lesser or greater extent) than the dried yeast that is suppose to substitute them. However, there do appear to be certain strains that are the "major players" in the world of yeast, and that are the strain of choice for a large number of beers. Many of those appear to also be available in dried form. In fact, it appears that most dried yeast available today is a dry form of well known liquid strains.
So I compiled a little table of dry yeast and the liquid yeast from which it is derived. This is not an equivalence table - there are many more strains that you can substitute a given strain of dry yeast for and get acceptable results. The strains in this table are supposedly identical, or nearly identical to the liquid form.
A couple of caveats:
1. Like any form of processing, drying subtly changes the yeast. So while the strains are supposedly identical, there may be slight variations in profile, lag time, etc.
2. Since the information here was compiled from several different sources, and is sometimes based on opinions and educated guesses it varies in reliability. Those strains for which confidence is not high, or that there is debate about the exact strain of are marked with a question mark.
Fermentis:
US-05 - WYST1056 - WLP001
US-04 - WYST1098/1099? - WLP007
K-97+ - Wyeast 1007? - WLP320?/036?
WB-06 - WYST3333 - WLP380 - Weihenstephan 66?
T-58 - WYST3724/1214? - WLP565/500? - Chimay? / Saison Dupont
S-23 - WYST2001?/2206? - WLP800?/820? *
S-189+ - ? - WLP885 - Samichlaus
W34/70 - WYST2124 - WLP830 - Weihenstephan 34/70
Danstar:
Nottingham - WYST? - WLP039
Windsor - WYST1928?/1068? -WLP002
Munich - WYST3638 - WLP351 **
Coopers:
CoopersAle - ? - WLP-009
Mutons:
Mutons ale - WYST1968? - WLP-002 ***
+ Yeast is marketed as "Craft Brewing" yeast (as oppose to home brewing) and may not be available in small packets
* S-23 Seems to change its character depending on brewing temp. Fermenting clean at about 60F, and fruity at around 50F
**Danstar Munich is reputed to be the same strain as 3638/351, but the drying process tends to result in a less phenolic profile
***For an opinion on Mutons yeast I will refer you to Finn Hill Brewing Blog, which I feel has summarized the yeast well: http://finnhillbrewing.blogspot.com/2010/12/dry-yeast-conversion-chart.html see comments below the chart.
I'll welcome any additions and contributions to the chart. I've primarily focused on yeasts available in Israel, but if anyone wants to add international yeasts, I'd be happy to.
Sunday, December 4, 2011
The first ever Three Cats "Beer God" award
As we grow and develop as brewers, beer connoisseurs, and craftsmen, it is important to learn from others who have valuable insight to share. Often those others are writers and professionals who share their advice via printed or electronic media. But just as often, if not more, these advices come from fellow brewers who answer a simple (or not so simple) question. Sometimes, the difference between success and sewage hinges on who's advice you listen to.
When we do get an especially good piece of advice, I feel it is important to share it and acknowledge to giver. I recently got such an advice: I had brewed a lager with a bit of difficulty, and had invested quite some time and effort into it. Considering the brew's rocky birth, I was thrilled when I tasted it at bottling and found that it had quite the potential. However, when I tasted the first bottle after carbonation I was nightly dismayed: The beer had almost no carbonation!
I was ready to pour the thing down the drain (as was the advice of a fellow brewer) and disavow ever brewing lagers again. Luckily, before I did, I shared my predicament with another brewer. His advice was as follows:
" Warm them up and turn them upside down to get the yeast back into suspension. If that doesn't work you can uncap all the bottles and dose with a bit of fresh yeast." "I'd wait 2-3 weeks, it is not an instant fix. If that doesn't work you can try the reyeasting."
I was a bit skeptical that such a simple idea would work. But my other options were pouring more yeast in or pouring the beer out, so I didn't mind trying. I took the beer out of the refrigerator, gave it a few good shakes, and turned it upside down. Then I forgot about it until this last weekend.
When I came back to it a couple of days ago, I poured a cold bottle into a mug, and was amazed to see actual stable head forming on the beer! I tasted it, and by gum, it had carbonation!. Not as much as I'd like (I think I didn't quite give it enough sugar) but definitely in the realm of drinkability. My beer had gone from sewage to success!
The brewer who gave me the advice which saved my beer was Mike "The Mad Fermentationist" Tonsmeire. And for his help he is presented with the first ever Three Cats Blog "Beer God" award for outstanding advice or service in the field of Home Brewing. Mike, this one's for you:

Tuesday, November 29, 2011
It's (not) getting hot in here
Aside from the general prerequisites of pots, tuns, ingredients, water, and general mayhem, the The Three Cats Brewery features, well, three cats. Those wild, furry, semi-domesticated predators who love to poke a paw at a running tap of sanitizer and flip over a jar full of yeast. Generally, the cats don't actually impact the brewing process much (aside for extra vigilance about cat hair). But they do have one annoying habit: They go to the bathroom quite a lot, which means that they need to get out to the porch (where the sandbox is located) on a regular basis.
I am telling you all of this as a way of explaining why it is that even at the dead of winter we leave the door to the porch ajar. And why, consequently, the temperature in our house routinely dips into the teens. Ordinarily, this is not much of a problem: We own a large number of blankets and warm cloths, and we keep the young brew-mistress on us regularly, so we all stay warm. But you can't put a blanket on a fermentation bucket (well, you can, but it wont do anything), and at night when we turn the heat off the temperature in the living room where I keep the fermentation fridge does drop substantially. So if I want to maintain my yeast happy and active, I need to use that other function on my temperature controller and warm the beer.
In talking to fellow brewers about this I came up with several ways you can warm a fermenting beer in a fridge. You warm it in a fridge because it's a small and insulated space that you can easily control, and because if you set your heating and cooling at the same place, you don't have to move the beer when the weather changes.
The first method is to use a space-heater or a blow-dryer. You install the thing in your fridge (preferably instead of the vegetable drawer) and plug it into your PID controller. Simple and straight forward. The only problem is that a space-heater, by definition, is not designed to be used in a small confined space (like a fridge) and requires a free flow of air or it gets very overheated. Plus, there's just something about the idea of putting a heater inside my fridge that sets my teeth of edge. I know people do this, and it works, but it still feels like a recipe for trouble.
Second is using a lamp. A regular, 100W light-bulb can produce enough heat to warm an average-sized fridge. There are two problems with this method. One, it is highly inefficient, since the heat is not directed, you must heat the whole volume of the fridge, which means running the bulb for rather a long time every time you open the door of the fridge. The second problem with this method is that the bulb doesn't just produce heat, but also (or rather, mainly) it produces light. Light is bad for beer. (More precisely, it is bad for the hop oils in the beer). And seeing as most of us use buckets or carboys that are light-permeable, long exposure to light is not an optimal solution.
Third is using a heat lamp. Like this: http://www.petplanet.co.il/product.asp?id=654 This is a ceramic terrarium heat lamp that produces the heat without the light. The downside is that it is fairly expensive.
Fourth is using a commercial product, like this one: http://morebeer.com/view_product/16674/102282/The_FermWrap_Heater Nice and elegant. But requires shipping from abroad.
A nice compromise that we came up with during the discussion is to use a regular light bulb (option two) which is mounted instead of the vegetable drawer, and then covering the bottom shelf of the fridge with aluminum foil to keep light from reaching the fermentor. This is definitely a workable option, as it deals with the one major drawback of heating with a light bulb. However, I feel that this is a very wasteful proposition, since the foil will also reflect a certain amount of infrared (heat) radiation, further reducing the efficiency of an already inefficient system. This is an inherent problem of all of the solutions that heat up the whole fridge space: They heat up rather more air than is strictly required to warm the beer, and are therefore inefficient.
At the end, I've decided to go with option four (the heat wrap). It has several important advantages that, in my view, justify the initial investment:
- It is efficient. At 40W, this this will nonetheless heat faster than a 100W light-bulb, meaning that it not only draws less power, it will also draw it for shorter times.
- It is environmentally independent. I can open the fridge door and let cold air in, and the beer will remain at constant temp. In fact, I can set the fridge temp lower (say to lager fermentation temp) and let a lager ferment in one side of the fridge while an ale is keeping warm right next to it.
- It is scalable. I generally only brew one beer at a time, but this product can actually be used to warm two fermentors side-by-side if I so choose.
- It is portable. I can take it to the basement (where the temp ranges from 12 to 14 degrees in this time of year) and let it keep a fermenting secondary from getting too cold down there.
- It is cheap. At $30 plus free shipping, it is actually cheaper than the terrarium lamp. Luckily I have family who is coming from the States soon and would be able to hand-deliver the thing to my door, so I don't pay for overseas shipping charges.
- It is safe to use in small, insulated environments. MoreBeer actually sell carboy bags you can use to insulate this thing. Makes me feel better knowing that this thing is not going to burst into flames.
- It is made for this application. This may seem trivial, considering how many times we homebrewers bastardize pieces of equipment that were designed for something else to use in brewing (laundry pumps and wort-chillers made out of copper tubing are just two examples of this). But given a ready-made, reasonably-priced, specifically-engineered, product that is built for our needs, I see no reason not to take advantage of it.
Saturday, November 19, 2011
I am the Lord thy G-d... Sorta..
On some level, a brewer is a sort of a yeast god. Taking the infant yeast from their little Eden in a test-tube or packet and casting it into a world flowing with maltose and oxygen with the commandant "be fruitful and multiply!". We seek tribute from our creations in the form of alcohols, CO2, and flavors, and threaten damnation down the drain if they misbehave.
Of course yeast, unlike human, are kinda stupid and simple. Having only a single cell and a mare sixteen sets of chromosomes to the human 23, they haven't quite evolved complex skills such as language and writing. If you want yeast to do something, you have to give them the conditions to do it. One thing we as brewers often want from our yeast is to grow into more yeast. To do this we must give them two main things: Food (in the form of maltose and other complex sugars) and Air (Oxygen). Like most organisms, yeast will use up air long before they ran out of food. So if we are trying to get them to keep growing and multiplying we have to give them more and more Oxygen. In a yeast Starter (the place which we most want the yeast to multiply) we do this by shaking the beaker regularly or, preferably, by putting it on a stir plate where it can have a regular supply.
All of this is by way of long-winded introduction to the fact that I decided that I really want a stir plate at home so I can make good starter. Unfortunately, a basic stir plate in this country costs about 800NIS (over $200US), so I wasn't going to buy one. I decided to build one instead.
Building a stir plat is actually quite easy. All it involves is finding a computer cooling fan, sticking a couple of magnets on it, connecting it to an appropriate power source, and building a housing over the whole thing. I built my stir plate based on a page-long instruction which I found on a brewing forum. I wont share the the link here, as the instructions were not very good. The electronics were overly complicated and it lacked some important details. Instead I will tell you that there are plenty of YouTube videos about this, and they're fairly comprehensive.

This is the finished product. You can see the strong magnets mounted on the computer fan. They are the ones that engage the stir stick inside the Erlenmeyer flask that actually does the stirring. The whole thing is mounted in a makeshift enclosure that I built out of spare wood and clear plastic, and I use a variable resistor to control the speed of the fan and the speed of the stirring. Total cost for this fully functional plate: 6.80Nis for the Teflon-coated stir stick (Just under $2US).

Here's the stir plate in action. Screws all set and balanced, and the stir stick engaged. if you look carefully you can see that the wort inside is spinning and is pulling a nice vortex. Mission accomplished. The yeast can go forth and multiply.
There are a lot of random pieces of equipment involved in our craft. I have seen brewers make fermentors out of some mighty weird containers, build wort chillers out of garden hoses and copper tubing, bastardize laundry machine pumps and use innovation and creativity to create an endless array of useful appliances. It is one of the greatest aspects of our hobby, I think. We don't just make beer, we make the things that make things happen. We create the world in which water, air, and sugar combine to make a little drop of heaven for our yeast, and it rewards us with beer. We are yeast gods.
Monday, November 7, 2011
Liqour, devil be they name!
Homebrewers have a saying. Actually, we have many saying, some of which don't make sense. But this particular one goes: "Never pour a beer down the drain. You never know if it could be good in a month, or a year, or to give to people you don't like. And if all else fails, you can always use it for cooking"
Except that you can't really cook with any beer. It has to be the right beer for the entree, and needs to be of decent quality or it will show. I tried making brown-ale poached salmon for dinner a few nights ago. A culinary experience that was best summed up by my dear wife "You know, I think this might be really good with some Barbeque sauce..." (My wife is a kind and gentle woman :) )
Of course the reason that I was trying to make brown-ale fish is because of this very same saying. I made this ale about a month and a half ago in a period leading up to my daughter's birth, when I wasn't allowed to brew AG because it takes a whole day, so I brewed some extract beers just to keep in shape. It was a fine attempt in making a southern brown English ale that was going beautifully until I tried to make container seal tighter and ended up dropping the O-ring that was suppose to seal the thing, and the silicone ring that was suppose to keep it in place - right into the beer.
Guided by the rule of "never pour out a beer" I proceeded to bottle it on schedule. However, since I was convinced that it will go bad within a week or two of bottling I didn't want to waste "good" bottles on it, so I bottled it in whatever I could find: odd sized bottles, a few halves with resealable tops, clear Corona bottles (a donation), and a empty coffee jar that I kept sanitizer in (figured that made it clean enough). I named it "Bad Bad Leroy Brown" (Baddest beer in the whole damn town...) or BBLB for short.
That was a month and a half ago, and while the beer has actually turned out quite nice (for an extract brew) I'm still trying to get through it as quickly as possible before the infection shoe drops. I drank a bunch, I gave some to friends (admonishing them to drink it quickly) and I've tried cooking with it. Brown Salmon may have not been the greatest brainstorms. But, undettered, I moved on to my next big idea: Brown Ale Deviled Eggs. Those of you of eastern European decent will probably recognize them by their popular name: "Chaminados".
The recipe is quite simple:
- 500 to 660ml Brown Ale (Newcastle Brown is great for this)
- Eggs, fresh
- Some onion peels
- A teaspoon of peppercorns
- Two clove nails.
 Dump all the ingredients in a crock pot, add enough warm water until the eggs begin to float, cover, and cook on high for at least six hours (more if you can muster the patience. Twelve is ideal)
The eggs' porous shell will let the beer seep through by slow osmosis, cooking the eggs and imbuing them with the color and tastes of the beer. The result is beautiful brown eggs with a delicious aroma and a very nice flavor. And, you've used up some of that extra, hard-to-drink beer! Mmmmmm, yum!
Except that you can't really cook with any beer. It has to be the right beer for the entree, and needs to be of decent quality or it will show. I tried making brown-ale poached salmon for dinner a few nights ago. A culinary experience that was best summed up by my dear wife "You know, I think this might be really good with some Barbeque sauce..." (My wife is a kind and gentle woman :) )
Of course the reason that I was trying to make brown-ale fish is because of this very same saying. I made this ale about a month and a half ago in a period leading up to my daughter's birth, when I wasn't allowed to brew AG because it takes a whole day, so I brewed some extract beers just to keep in shape. It was a fine attempt in making a southern brown English ale that was going beautifully until I tried to make container seal tighter and ended up dropping the O-ring that was suppose to seal the thing, and the silicone ring that was suppose to keep it in place - right into the beer.
Guided by the rule of "never pour out a beer" I proceeded to bottle it on schedule. However, since I was convinced that it will go bad within a week or two of bottling I didn't want to waste "good" bottles on it, so I bottled it in whatever I could find: odd sized bottles, a few halves with resealable tops, clear Corona bottles (a donation), and a empty coffee jar that I kept sanitizer in (figured that made it clean enough). I named it "Bad Bad Leroy Brown" (Baddest beer in the whole damn town...) or BBLB for short.
That was a month and a half ago, and while the beer has actually turned out quite nice (for an extract brew) I'm still trying to get through it as quickly as possible before the infection shoe drops. I drank a bunch, I gave some to friends (admonishing them to drink it quickly) and I've tried cooking with it. Brown Salmon may have not been the greatest brainstorms. But, undettered, I moved on to my next big idea: Brown Ale Deviled Eggs. Those of you of eastern European decent will probably recognize them by their popular name: "Chaminados".
The recipe is quite simple:

- 500 to 660ml Brown Ale (Newcastle Brown is great for this)
- Eggs, fresh
- Some onion peels
- A teaspoon of peppercorns
- Two clove nails.
 Dump all the ingredients in a crock pot, add enough warm water until the eggs begin to float, cover, and cook on high for at least six hours (more if you can muster the patience. Twelve is ideal)
The eggs' porous shell will let the beer seep through by slow osmosis, cooking the eggs and imbuing them with the color and tastes of the beer. The result is beautiful brown eggs with a delicious aroma and a very nice flavor. And, you've used up some of that extra, hard-to-drink beer!
 Mmmmmm, yum!
Monday, October 31, 2011
The future is now (but not here)
When you read homebrewing books that were published in the US, you can't but think that we are living in the golden age of home brewing. Material and tools that were previously only available in commercial applications have permeated the home brew market, and resulted in an explosion of styles and creativity. Yeast strains from commercial breweries are readily available; plumbing, fake bottoms, cam locks, and pre-made wort chillers can be easily purchased at reasonable prices; specialty malts and extracts, rice hulls, acids and sugars are stocked by any self-respecting HBS. Life is good.
And then you look at our local market in Israel. I recently found a challenging recipe for a beer from 100% wheat malt. If I were in the States this would not be a problem: I'd get my grain, mix in about half a kilo of rice hulls, and sparge as I always do. But in Israel you can not get rice hulls anywhere, and even if you could, you'd still be limited to the handful of dried yeast varieties we have. You could try to make the beer out of wheat extract instead - it would save you the potential for stuck sparge. But the chances of getting fresh wheat extract in this country depend on fostering a close relationship with your local brew store, and catching them at exactly the right time - the once or twice a year that they order wheat extract. A lot of extra effort, and besides, who wants to brew extract?
Actually, I would love to brew extract. More precisely: I would love to still be brewing extract, and looking forward to moving to All Grain in the future. It's a much gentler introduction to brewing than to jump right into AG from your second brew on like I did, simply because my local store didn't have extract in stock. I later learned that "local" HBS only applies if you live in the Tel Aviv metro area. For everyone else, there's a choice of car or shipping, or just dealing with the limited supplies and low turnover of "sales points".
Some of this deficiency in selection is understandable: Liquid yeast, for example, is hard to transport, expensive, and requires a kosher seal (though I'm not sure why. If you're not satisfied with the kashrut, don't buy it). So it is too much of a pain to import for such a small market as ours. But some of this is the result of a product Catch-22: Nobody imports rice hulls because there's no demand for them. And there's no demand for them because no one uses them in brewing (because no one imports them).
This is where the onus is on our local suppliers to introduce new products to the market even if they don't make money on them right away. Someone should import rice hulls, I will be the first to buy them, I promise you. And because I'm lazy, if I found one store that sales rice hulls I'd order my entire bill grain from there, even if they weren't my regular store. And I'm not alone in that: A store that introduces new products to the market regularly, even at a potential loss, will benefit from more clients and improved sales in the long run. We're not too good at taking the long view in this country, unfortunately, but I'm hoping someone will pick up the glove.
It's not all bad, though. The lack of certain products, tools, and aids forces us to be creative: Someone pointed out to me that BIAB doesn't suffer from stuck sparges. That is something I will keep in mind, and when the day comes when I decide to brew my all-wheat beer this is how I will do it. It's not the regular way I brew, but it is another tool in my brewing toolbox which I can use. When I get tired of using dry yeast, I will turn to culturing my own liquid yeast out of bottles and samples of liquid yeast hand delivered by friends from other countries. It's a lot more of a pain, but ultimately it will make me a better brewer.
And at the end of the day, there's always hope. Twenty years ago home brewing in the States wasn't nearly as easy or prolific as it is today. One can hope that as home brewing in Israel takes off the situation will improve here as well. And it already has: In the last ten years the availability of malts, yeasts, and equipment in this country took a huge leap forward. Hopefully we will eventually catch up the the US in that field. Hopefully it will not take twenty years to do so.
Tuesday, October 25, 2011
A new brewmaster in the Three Cats Brewery
So the blog is has not been updated lately, and probably will not be updated very often in the near future, due to the arrival of a new Brewmaster (Brewmisstress?) in the Three Cats Brewery house. She's Nitsah Harel, born last Saturday (22nd) at 1:06am at a weight of 3.260kg.
So far, the new brewmisstress has not been actively involved in production aside from producing her own trub-like substances and forcing a delay of the latest batch's bottling. But we predict a great career for her in the business, starting with things like bottling help, and on to brewing her own one day. :)
In the meantime, we would love recipe ideas for a celebration brewing. And names for the beer as well!
Saturday, October 15, 2011
Decisions Decisions
I've mentioned about a dozen times already that I'm in the midst of re-designing my brew system and turning it into a full HERMS system. I already have most of the major parts: THe HLT, the silicon tubing, the heating element (one of, at least) the controller and the SSR probe. But I've been going back and forth in my mind about the pump.
On the one hand, I could do just fine on a laundry machine pump. I have one already and it works well. Granted, the one I have only ever pumps cold water, and this one will need to pump hot wort, but that's ok. It'll last for a while. And when it falls apart well.. They're cheap enough to just get another one.

On the other hand, a laundry pump is a second-best solution. For the best in home brewing, there really is only on king: The March 809 brewing pump. Actually, that king had been dethroned by the 815, which is the same pump, but with better performance. If you're going to get a brewing pump to transfer hot liquid, this is the one to get.
It is a thing of beauty.
Except that the March pump is quite expensive. For the price of one March pump I could get about four or five laundry pumps.
One the other hand, a March pump will easily outlast four or five laundry pumps. And is made of food grade material. If I'm going to be pumping hot wort, not just cooling water, that's something to think about.
And so on and so on.
My wife set me on the right track at the end. She said "If you're going into all the work and expense to re-do your system, it should be a system you're really happy with"
So I decided to order the March Pump. To paraphrase Crosby Steels and Nash. "If you can't be with the one you love, look online for it" (Doesn't scan as well, but it's better advice)
So that's it. Pump's on its way. With my father bringing it in a suitcase it would hopefully not be as expensive as having it shipped. Estimated due date: Mid November
Also this week: Avi and I brew a Belgium to inaugurate his new fridge, and I get up in the morning and decide to brew beer from leftovers. But that's a different post.
On the one hand, I could do just fine on a laundry machine pump. I have one already and it works well. Granted, the one I have only ever pumps cold water, and this one will need to pump hot wort, but that's ok. It'll last for a while. And when it falls apart well.. They're cheap enough to just get another one.
On the other hand, a laundry pump is a second-best solution. For the best in home brewing, there really is only on king: The March 809 brewing pump. Actually, that king had been dethroned by the 815, which is the same pump, but with better performance. If you're going to get a brewing pump to transfer hot liquid, this is the one to get.
It is a thing of beauty.
Except that the March pump is quite expensive. For the price of one March pump I could get about four or five laundry pumps.
One the other hand, a March pump will easily outlast four or five laundry pumps. And is made of food grade material. If I'm going to be pumping hot wort, not just cooling water, that's something to think about.
And so on and so on.
My wife set me on the right track at the end. She said "If you're going into all the work and expense to re-do your system, it should be a system you're really happy with"
So I decided to order the March Pump. To paraphrase Crosby Steels and Nash. "If you can't be with the one you love, look online for it" (Doesn't scan as well, but it's better advice)
So that's it. Pump's on its way. With my father bringing it in a suitcase it would hopefully not be as expensive as having it shipped. Estimated due date: Mid November
Also this week: Avi and I brew a Belgium to inaugurate his new fridge, and I get up in the morning and decide to brew beer from leftovers. But that's a different post.
Tuesday, October 11, 2011
The 73rd volume
In the first masechta (portion) of Baba Metzia, one of the books of the Jewish Talmud, there's a long and complicated discussion about what to do in the situation when two men are holding on Talit (article of cloth), each claiming ownership of the whole garment. The discussion goes on and on about the different ways to handle this situation, bringing in opinions from several distinguished rabbis, and dissecting the issue in detail. Then it goes on to the next topic of discussion: Two men are holding the same Talit, one claims the whole thing, one claims half of the thing. What do you do then? Then the next topic: Two man are holding the same Talit, each claiming the whole thing, and there's a door between them. What do you do then? Then the next: Two men are holding the same Talit. Each claims all of the thing, and one of them is standing on a boat. What do you do then?
The Talmud is the compendium of Jewish law. But that's actually not true. There are 72 volumes to the Talmud. The amount of actual law in there is probably only about one book's worth. The rest is commentary, and more important, arguments. Lots and lots of them.
I mention all of this because sometimes when I read brewing books, I get the same feeling I got when I use to study the Talmud. Rabbi Palmer says thus shall not use hops for longer than 60 minutes, for they will not contribute any more acids. Rabbi Mosher, on the other hand, gives recipes using hops for 90 minutes, and claims that yeast should rehydrate at warm (41C water). But rabbie Papazian disagrees.
And to make matters worse, you have the local commentaries: The guy who claims that mashout is unnecessary when using HERMS. The dealer that says "I don't have 80L. Take some 60L and 120L and mix them together, it'll work". The guy who cites the Australian brewing rabbinate and claims that the best way to brew is with a bag and a plastic cube, and the guy who disagrees. Seriously. If we take about a dozen active threads on any beer forum, translate them to Aramaic, and put "rabbi" in front of the user names, it would read just like the 73rd of the Talmud. Masechet Mivshulim.
Why am I mentioning all this? Because I have decided to re-vamp my system. In fact, I'm rebuilding it completely to be a full-pledged HERMS system. At least that's the theory. In practice, there is so much information out there, and so many contradictory opinions that one can be stuck in an "information paralysis" - where you're so afraid of doing something wrong that you end up doing nothing at all.
And to that too, Jewish tradition gives an answer. In Pirkai Avot Rabbi Yhosua says "Make yourself a Rabbi" - Pick someone to follow and learn from. So often in Brewing (and Halacha) there are so many contradictory opinions involved that you just have to pick someone who looks like they know what they're doing, and seek their advice. As an interesting side note to that idea, the Rambam adds a commentary to that verse saying "Learning is good, but learning from from his fellow will be more successful and better understood. Even if his fellow is of the same wisdom as he, or below him" IE, every person, no matter how knowledgeable should find a "rabbi" - a person to learn from and learn with, even if he believes that person to be less knowledgeable than himself. Or in other words, no one person knows everything, and you can always learn new things.
Thursday, October 6, 2011
My cider will kick your beer's butt!
I made hard cider a couple of weeks ago.
I made cider because brewing all grain is a lengthy process, and I'm not allowed to do it until the baby comes. I brewed a couple of extract beers in the meantime, which was kinda nice (like going back to a family sedan after a long time or riding a motorcycle) but boring. So I moved on to other alcoholic beverages.
Cider is remarkably easy to make. You mix apple concentrate with enough water, add sugar, boil a bit, cool, and pitch. That's it. Of course, never content to do things the easy way, I ended up adding not quite enough water, and added in all the inverted sugar I had on hand (about half a kilo, to an 8liter batch) and so I ended up with cider that had a starting gravity of 1.079. Given that I could expect it to drop to about 1.005 if I let it ferment all the way, I was looking at almost 10% ABV. A bit high for a fruit drink. It would be better if I could stop the fermentation before it went all the way.
One way to stop the fermentation, or at least to dramatically reduce it, is to keep the drink cold, and remove as much of the yeast as you can. Of course, you can't go in there with a sieve and fish the yeast out, but it turns out that if you cool the liquid, the yeast will go dormant and fall out of suspension. Which is a win win situation, if you can get the thing cold enough. 4-5 degrees C ought to do the trick. This is called "Cold crash".
Ah, but there's a problem: My fridge, which has been the subject of much consternation lately, is nowhere near that cold. And given that it is currently fermenting lager, it shouldn't be that cold. What can you do?
Enter the MLCS-7 Massive Liquid Cooling System. Also known as "my mash tan cooler, with about 7 liters of ice:
 I have a pretty small mash tan, but my small fermentator fits in it perfectly. I put it in the middle, put as much ice around it as I could (in re-freezable plastic bottles) and topped it off with cold tap water. To carry the heat better I connected my pump to circulate the water from the bottom of the tan back on top. This turn out to be completely unnecessary as, within 12 hours, the temperature of the water dropped to an incredible 1.3 degrees C - my actual fridge doesn't get that cold!
After about 42 hours the cider was so thoroughly cold crashed that it had virtually gone through the floor. I transferred it to a bottling bucket, leaving behind most yeast, added a bit of sugar (totally unnecessary since after the crash it read 1.025, which meant it still had plenty of sugar in it, but old habits die hard) and bottled about 8 liters of golden goodness. It's sweet, eminently drinkable, girls like it, and at 8% Alcohol By Volume it will kick your butt!
As a side note: Heat is energy, and energy can only be transferred, not destroyed. I got a great illustration of this during the cold crash process. I would rotate the ice bottles in and out of the cooler, taking freshly frozen bottles from the freezer, and putting half-thawed bottles back in. As a result, the temperature in my freezer rose dramatically from about 7-8 degrees below to 1-2 degrees below zero, as the freezer worked to dissipate the heat energy that the ice had gathered. Now that I've finished the process, and the freezer doesn't have to deal with the extra heat, the temperature in there had fallen as low as -8.5C. Which is great for trying to lager my lager in the fridge. But that's a different story.
Wednesday, October 5, 2011
Newtonian Brewing
A word of warning: I have had a rather broad scientific education, and I like physics. The following is a discussion of Newtonian Thermodynamics, observation, energy exchange, and beer. If you don't have the patience to read it, you can skip to the last paragraph, which contains the actual point.
-----
As brewers, we heat and cool beer regularly. It is part and parcel of the brewing experience, and a major factor in how the beer turns out. It is a most fundamental part of brewing. It is also a lie.
It's a lie because this is not actually what were doing. What we are doing is applying energy to a system in order to affect a change in the energy state of a system. Put simply: We don't heat or cool beer, we do things to the environment the beer is in, in order to make it hotter or colder.
This may seem like a petty distinction, and in the case of heating beer, it generally is: When I put a heating element in a vat of beer and turn it on, I'm heating the beer. (At least in any Newtonian sense of the word). But in the case of cooling the beer, this is actually something worth considering: When I cool beer, I don't take energy out of it. I don't aim a "Cold Ray" at it. I put it in the fridge. I change the temperature around the beer, so that the temperature of the beer changes.
And this is important because when I measure the temperature of the beer, I don't actually measure the beer. I measure the temperature of the environment the beer is in. When I tape a sensor to the fermentation bucket, the reading I get will be an average of the temperature of the bucket, and the temperature around the bucket. It will NOT be the temperature of the beer.
Now presumably if you leave an object in an ambient temperature for long enough, it will end up being in ambient temperature. You can try this with a simple experiment: pour a glass of ice water and leave it on the counter. It will eventually warm to room temperature. So be extension, if you had a thermostat next to the glass that showed the room temperature, it would also show the water temperature, since they end up the same.
But beer doesn't work that way. Beer ferments, and fermentation is an exothermic process - it creates heat. Leave a bucket of fermenting beer on the counter, and it will not reach room temperature, because it makes its own heat.
It gets worse: If you tape the sensor of your thermostat to different spots on the bucket, you will get different readings. This is true because beer, like any liquid, stratifies according to density and thermal layers. Moreover, if you tape your sensor to the lid, which does not come into direct contact with the beer, you will get a reading that's much closer to the ambient temperature than the beer temperature.
Now do a little thought experiment: Lets say that you have beer that is finished fermenting. You fill a bottle with it, put both bottle and fermentation bucket in the fridge, and tape the sensor to the bottle. How close is your reading to the temperature of the beer in the bucket?
The answer is, you don't know. Your bottle may cool faster because it's a smaller thermal mass. It may read cooler because it's further in the back of the fridge, or because glass is a better thermal conductor than plastic. It may read warmer because the curve of a glass bottle is bigger than that of a bucket, so the surface area in contact with the sensor is smaller. You simply don't know.
All of this comes by way of saying something simple: Two days ago, my beer was in secondary fermentation, at temperature of 11.5C. Now it's heading toward lagering, with a temp of 8C and falling. I didn't touch the beer. All I did was to change where the sensor was located. So I don't know what temperature my beer is really in, and what temperature was it before. And it's kind of driving me nuts. :)
Tuesday, October 4, 2011
The Heisenberg Beer Principle. OR: Why tape is important for beermaking
I don't like lagers. In all the lagers I've ever drank (and I've drank quite a few) I've only found one that I really like (Libira's Double Pils, for those wondering). But as a rule, I don't like lagers. The only reason I'm making a lager now is that my wife is nine months pregnant.
Lagers are good for late pregnancy brews because they have two qualities: One, they are meant to be forgotten in a fridge for a while - so if you suddenly find yourself in the hospital on bottling day, no big deal. And two: While the fermentation refrigerator is maintaining lager temperature, the freezer drops well below freezing (not always a guarantee at ale temps) so your wife can store frozen meatloaf and chilli in there to have in the couple of weeks after the birth when no one has energy to cook. So I gladly volunteered my freezer for this, and heroically brewed a lager as my humble contribution to the baby making effort. ;)
Problem is, I have a fairly old fermentation fridge. I got it in the market, probably after it was cast out by someone who decided it wasn't good enough to keep around anymore. On an average day, this is fine. A fridge doesn't have to work as hard to maintain 18C as it does to maintain 4C, so this isn't an issue. But when you make a lager, you ferment it at around 11C and then you let it sit (lager) for about a month at 4C. I did some field testing with the fridge and saw that it can hit about 5-6C. So I figured that would be fine. (Palmer says that you can lager at 7C if you wanted, so OK.)
So I made a lager. And I fermented it. I set the temp at about 11C with a spread of .7 degrees, which gives the lager an average fermentation temperature of about 111.4 or so. A little warm (recommended fermentation temp is 10C) but the important thing about lagering seems to be the difference between fermentation temp and lager temp, and I knew that my lager temp will be a little warm, so I wanted to keep the temp spread.
This is where things started to go wrong.
See, the temperature controller that I (and many others in this country) use works by cutting the electricity to the whole refrigerator based on readings from a sensor. You tape the sensor to your fermenting bucket, and when the controller senses that the sensor is cold enough, it cuts the power so that the beer doesn't get too cold. Great in theory, not so good in practice. In practice, it seemed that my beer never hit that illusive cut-off temperature. It seemed that the fridge simply wasn't getting cold enough.
I consulted with a fellow brewer, who advised me to check my thermostat settings in the fridge. I did, and the results where immediate: Within a day the temperature, which had been hovering around 12C, jumped to 18C. Oh, the horror! Luckily, this was in the end of fermentation, so it wasn't necessarily a bad thing (it's often customary to raise the temperature of a lager at the end of fermentation for a couple of days.) But I needed to bring the temp back down. After much research and googling, I came up with a surprising answer: The colder the freezer gets, the warmer the fridge is.
The reason for this has to do with the way refrigerators are constructed. They work by cooling the freezer section, and then drawing cold air from the freezer to cool the fridge section. The colder you set your freezer to, the more cold air stays in it, and the less gets pulled into the fridge, so it gets warmer. Fantastic. Now all I need is to set the freezer to the warmest setting and the fridge will get cold again. Hurra, hurray!
Except that I have all that frozen meatloaf and chilli in my fridge. And it is thaws, I will be the one who has to cook after the birth. Oh the conundrum. At the end I decided that I'm not sacrificing the little energy I will have left for no stinking lager. I set the freezer to a medium setting. Cold enough to be thoroughly frozen, warm enough that some air actually got pulled into the fridge.
So the temperature in the fridge dropped again, but only as far as about 11.8C, as before. I was back to where I started.
And then I had an epiphany: In my efforts to do whatever I could for the lager, I had moved it to a glass demi-john, which was encased in a plastic basket. Being both a little lazy and not wanting to leave the fridge open, I had put the sensor for the temp controller in the basket, touching the glass, but not actually taped to it. Was it possible that the temperature it was sensing wasn't so much the temp of the beer, but the ambient?!? I decided to to an experiment. I fished a bottle of beer from the back of the fridge, thoroughly taped the sensor to it, and put it back in the back.
An hour later, the temp read 10.7
This morning, it read 9, which was what the controller is actually set for.
So now I have a puzzle: What is the actual temperature of my beer? What was the temprature when I was fermenting? What was it when I moved it to secondary? Will it, in fact, actually be able to reach 4-6, now that I've changed the measurement method.
Questions abound, time will tell. I don't have high hopes for this beer. But then again, it IS a lager...
Monday, October 3, 2011
We've gone global!
I started writing this blog when I first started brewing beer. And then I stopped. Primarily because I was writing in Hebrew and it's just not a language I can type very fast. (Plus the fact that I had a sum total of about two readers, both of which I corresponded with through other means).
Well recently one of those two readers suggested that I take the blog back up. And when I told him that it was too much of a pain to write in Hebrew, he responded that he'd be perfectly happy to read it in English. So Here it is. Re-vamped, and re-launched, ready for the global beer economy. :)
A lot of beer had been brewed in my kitchen since I last wrote in this blog, most of which bad. But I've learned a few things from each batch, and I hope I'll learn more in the future. In upcoming entries I hope to share a few insights and tales of fizzy alcohol. But first, the obligatory list:
Ready to drink:
"Bad Bad Leroy Brown" - A southern Brown ale with a twist (More later)
3% Apple Beer
4% Pomegranate beer
"Plague of the Firstborn Ver 2". - My attempt at making a Belgium Dubble recipe. Also known as "der crappe" (More Later)
Aging and waiting:
Prematurely Bottled HefeWizen - I've been resisting the urge to call this one "Yeast infection", on the hope that it will get better as it ages. (More Later)
8% Kick-your-ass-Apple-cider (A lot more on that one later)
10% Free Beer (A sixpack)
Odds and ends.
Fermenting and waiting:
"HeatBurger" German Lager (More Later)
Planned:
Dunkle-Hefe
Lot's more Cider
Brown without a twist
Scottish Ale (more of a hope than an actual plan.)
I hope that over the next few entries I can talk a bit more about some of these beers (especially the ones I labeled "more later") and others I plan to brew or drink. In the meantime, it's time to get off the train, so I'll sign off.
Monday, June 20, 2011
45 ליטר בירה ב11 שעות (חלק שני)
בפעם הקודמת עזבנו את גיבורינו כשהם מתבוננים ביאוש בסיר שאינו רותח ואומרים "שיט, זה לא רותח". ולמרות שבסוף זה כן רתח (לא ממש, אבל קרוב מספיק) הגענו למסקנה שלהתחיל עוד באץ אחרי שזה הגדול יסתיים פשוט יקח יותר מדי זמן. עדיף היה להתחיל את הבאץ השני מייד, אבל הסיר הענק מכסה את כל המבערים בכירה.
עבדכם הנאמן לטש עיניים בקופסת הרכז ושקית הגרעינים על השולחן.. "זה רק פארשל קטן... חייבת להיות דרך לעשות את זה". לאט לאט נוצרה בראש המחשבה. הסתכלתי בסיר, הסתכלתי בתנור האפיה, ואמרתי "ג'ורדן.... ניראה לך שזה יכנס לכאן?" הוצאנו כמה מדפים מהתנור וניסינו. וואלה, ניכנס כמו גדול!

משם זה הלך מהר (יחסית לסיר הגדול). הטמפרטורה בתנור ניקבעה על "הכי חם שיש", הסיר ניכנס,והופה. 69 מעלות כמו גדול. שמנו את הלתת המיוחדת בסיר בשביל סטייפיג ונתתנו לו לנוח. ממש כאילו בישלנו מקיט.
אה, וטיפ קטן למי שרוצה לנסות את זה בבית: אל תמדדו טמפרטורה על יד החזקת המדחום בסיר בתוך התנור. מנסיון, זו שיטה טובה לכוות את היד...
הבאץ הקטן היה אמור להיות בישול מהשאריות של מה שנישאר מהבישול הגדול. אז החלטנו שאם כבר שאריות, אז עד הסוף. במקום להוסיף חבילת שמרים לבישול, אנחנו נאסוף שמרים מבירות שנישתו במהלך השבוע. נישטוף אותם, וניזרוק אותם לבירה. אומנם לא נדע מה יש שם, בעצם. ולא נוכל לשחזר את הבישול בעתיד, אבל what the heck
 במשך שבוע השקעתי את עצמי במסימה המפרכת של שתית בירה כל יום, שמירת שמריה, ושפיכתם לתוך צינצנת קטנה במקרר. בסופו של דבר לא הייתי צריך לטרוח - קיבלתי את כל השמרים שהייתי צריך מהמשקעים שנישארו במיכל התסיסה אחרי הביקבוק בבוקר. הייתי צריך רק לשטוף אותם, ולשטוף אותם, ולשטוף אותם, ולזרוק אותם למיכל התסיסה. מי שמיסתכל טוב יכול לראות שכבת שמרים בתחתית הצינצנת.
האירוניה היא שבסוף כן זרקתי פנימה גם שמרים חדשים. מסתבר שדלי התסיסה שלי אטום רק כשהנשם בזווית מסוימת. אז למרות שבדקתי אטימות, בתכלס לא היו בועות בנשם. מה שגרם לי להאמין שאין תסיסה, ושמיחזור השמרים לא עבד. אז הוספתי שמרים חדשים. אבל עדיין לא היו בועות. עד שהגיע הזמן להזיז את המיכל הקטן כדי למקם את הגדול, ובמיקרה הזזתי אותו בצורה שסגרה את האטימות. ו...הופה! בועת בנשם כמו גדול.
אז אני יודע שהיתה תסיסה, ואפילו יפה. אבל אני לא יודע איזה שמרים עשו את העבודה. לא נורא, ננסה שוב בהיזדמנות.
בפרק הבא: "מישהו יודע איך לעזאזל מקררים עשרים וחמש ליטר של תירוש רותח בסיר שלא ניכנס באמבטיה?!?"
Saturday, June 18, 2011
45 ליטר בירה ב11 שעות (חלק ראשון)
בישול בירה, מטבעו, הוא לא עיסוק יום יומי. שזה טוב, כי אם הייתי חייב להשקיע 11 שעות ביום כל יום כבר מזמן הייתי נוטש את כל הרעיון...
היום התחיל כשידידי ג'ורדן הגיע לבשל, מחוזק בארבע בקבוקי בירה (מיסחריות אומנם, אבל טעימות) והרבה מוזיקה. אל הבקבוקים שלו התווספו תרומות משלי, כולל הבקבוק הראשון מהבאץ שעמדנו לבקבק היום (בקבוק האולטרה סאונד) כך שהתחלנו את היום מצוידים כראוי.
המשימה הראשונה הייתה, כאמור, ביקבוק הבאץ הראשון שבישלתי לפני שבועיים. הבאץ ההוא היה בישול של אמבר אייל מקיט של בירדי (עם שינויים קלים בשביל הכיף) שזכה רשמית וחגיגית לכינוי "ניסוי כלים - Proof of Concept". אבל לפני כן, חיטוי מאסיבי. מיכל התסיסה השני (שהופך להיות מיכל המילוי) שני הגריקנים הקטנים (שאחד מהם יהפוך גם למיכל תסיסה קטן), ערמת כלים, וכמובן... בקבוקים. שטיפה, יבוש, חיטוי, שטיפה שניה, ויבוש שני. שעה וחצי של שיכשוך כייפי בברכה של נוזל חיטוי והיינו מוכנים.

הביקבוק עצמו הלך חלק (אחרי שגורדן קלט איך להשתמש במקל המילוי, ואני עשיתי סטאג' מזורז על הפוקק) בסופו של דבר ביקבקנו כ15 ליטר בתמהיל של בקבוקי שליש וחצי. כולל בקבוק אחד שקוף, כדי שאוכל לעקוב אחרי התפתחות הצבע והעננות לאורך זמן.
צבע יפה מאוד, לדעתי. אמבר עם נטייה לאדום. בדיוק לפי התיכנון.

אחרי הביקבוק, אפשר היה סוף סוף להתחיל בבישול. הבאץ הראשון היה של בירה בהירה בסיגנון בלגי, ובשיטת Brew In A Barrel - בישול בשק. 36ל מים ניכנסו אחר כבודם לסיר הענק (רכש חדש מטיול הציוד האחרון) והועלו ל72 מעלות צלזיוס. כ6.5 קג גרעינים טחונים נישפכו לתוך השק והטמפרטורה נמדדה. 66 מעלות. טיפה נמוך, אבל סבבא, נזרום עם זה. הטמפרטורה נישמרה לשעה, ואז לקחתי קריאת הידרומטר. בדיוק לפי הספר.
ואז, בעיה ראשונה: גראוויטי משוארת ע"פ ביירסמיט הייתה1.059, אבל הקריאה בשטח הייתה רק 1.023. אסון! בקצב כזה, הבירה תהיה ברמת אלכוהול של בערך 2%. זה לא בירה, זה משקה קל.
מסתבר שלזרום עם טמפרטורת מאש נמוכה לא ממש עובד, וצריך לחמם את המאש. ובאותה הזדמנות גם לערבב אותו. 6.5 קג בשקית זה המון גרעינים, והמיים פשוט לא מגיעים לכל הגרעינים. אחרי שעה נוספת של חימום, בחישה, וקריאות הידרומטר, הגענו לבערך 1.046. לא מה שקיוויתי, אבל כבר יותר סביר. יש לי סיר רחב, וקיויתי שהאידוי המוגבר יאזן את הצפיפות הנמוכה קצת.
אגב, כמה מילים על שיטת ה BIAB: כשיטת אול גריין אני חושב שאין שיטה יותר נוחה לעבודה. כל המאש והבישול נעשה באותו סיר. אין משחק במים כדי להשיג טמפרטורה נכונה (פשוט מדליקים את האש), ואין צורך להעביר את התירוש ממאשר לסיר וכו. הדבר היחידי שצריך לעשות זה להרים את השק מתוך הסיר. לתת למים לזרום חזרה פנימה, ולהניח בצד. בתאוריה, זה קלי קלות.
למעשה, 6.5 קילו גרעינים מלאים במים שצריך להחזיק באוויר כמה דקות טובות זה, איך נאמר, קצת כבד...
כל אותם שעות בחדר כושר ממש השתלמו בסוף. לא?
שעתיים. שעתיים לקח לסיר להגיע מחום של כ67 מעלות ל95. לרתיחה אמיתית הוא אף פעם לא הגיע. אבל ב95 יש כבר בועות וזרמים בתירוש ואפשר לזרוק פנימה שקיקים עם כשות, תבלינים, וכו. בזמן שחיכינו החלטנו לאפות את הבאץ השני בתנור. אבל על כך בפוסט הבא
היום התחיל כשידידי ג'ורדן הגיע לבשל, מחוזק בארבע בקבוקי בירה (מיסחריות אומנם, אבל טעימות) והרבה מוזיקה. אל הבקבוקים שלו התווספו תרומות משלי, כולל הבקבוק הראשון מהבאץ שעמדנו לבקבק היום (בקבוק האולטרה סאונד) כך שהתחלנו את היום מצוידים כראוי.
המשימה הראשונה הייתה, כאמור, ביקבוק הבאץ הראשון שבישלתי לפני שבועיים. הבאץ ההוא היה בישול של אמבר אייל מקיט של בירדי (עם שינויים קלים בשביל הכיף) שזכה רשמית וחגיגית לכינוי "ניסוי כלים - Proof of Concept". אבל לפני כן, חיטוי מאסיבי. מיכל התסיסה השני (שהופך להיות מיכל המילוי) שני הגריקנים הקטנים (שאחד מהם יהפוך גם למיכל תסיסה קטן), ערמת כלים, וכמובן... בקבוקים. שטיפה, יבוש, חיטוי, שטיפה שניה, ויבוש שני. שעה וחצי של שיכשוך כייפי בברכה של נוזל חיטוי והיינו מוכנים.

הביקבוק עצמו הלך חלק (אחרי שגורדן קלט איך להשתמש במקל המילוי, ואני עשיתי סטאג' מזורז על הפוקק) בסופו של דבר ביקבקנו כ15 ליטר בתמהיל של בקבוקי שליש וחצי. כולל בקבוק אחד שקוף, כדי שאוכל לעקוב אחרי התפתחות הצבע והעננות לאורך זמן.
צבע יפה מאוד, לדעתי. אמבר עם נטייה לאדום. בדיוק לפי התיכנון.

אחרי הביקבוק, אפשר היה סוף סוף להתחיל בבישול. הבאץ הראשון היה של בירה בהירה בסיגנון בלגי, ובשיטת Brew In A Barrel - בישול בשק. 36ל מים ניכנסו אחר כבודם לסיר הענק (רכש חדש מטיול הציוד האחרון) והועלו ל72 מעלות צלזיוס. כ6.5 קג גרעינים טחונים נישפכו לתוך השק והטמפרטורה נמדדה. 66 מעלות. טיפה נמוך, אבל סבבא, נזרום עם זה. הטמפרטורה נישמרה לשעה, ואז לקחתי קריאת הידרומטר. בדיוק לפי הספר.
ואז, בעיה ראשונה: גראוויטי משוארת ע"פ ביירסמיט הייתה1.059, אבל הקריאה בשטח הייתה רק 1.023. אסון! בקצב כזה, הבירה תהיה ברמת אלכוהול של בערך 2%. זה לא בירה, זה משקה קל.
מסתבר שלזרום עם טמפרטורת מאש נמוכה לא ממש עובד, וצריך לחמם את המאש. ובאותה הזדמנות גם לערבב אותו. 6.5 קג בשקית זה המון גרעינים, והמיים פשוט לא מגיעים לכל הגרעינים. אחרי שעה נוספת של חימום, בחישה, וקריאות הידרומטר, הגענו לבערך 1.046. לא מה שקיוויתי, אבל כבר יותר סביר. יש לי סיר רחב, וקיויתי שהאידוי המוגבר יאזן את הצפיפות הנמוכה קצת.
אגב, כמה מילים על שיטת ה BIAB: כשיטת אול גריין אני חושב שאין שיטה יותר נוחה לעבודה. כל המאש והבישול נעשה באותו סיר. אין משחק במים כדי להשיג טמפרטורה נכונה (פשוט מדליקים את האש), ואין צורך להעביר את התירוש ממאשר לסיר וכו. הדבר היחידי שצריך לעשות זה להרים את השק מתוך הסיר. לתת למים לזרום חזרה פנימה, ולהניח בצד.
 בתאוריה, זה קלי קלות.
למעשה, 6.5 קילו גרעינים מלאים במים שצריך להחזיק באוויר כמה דקות טובות זה, איך נאמר, קצת כבד...
כל אותם שעות בחדר כושר ממש השתלמו בסוף. לא?
שעתיים. שעתיים לקח לסיר להגיע מחום של כ67 מעלות ל95. לרתיחה אמיתית הוא אף פעם לא הגיע. אבל ב95 יש כבר בועות וזרמים בתירוש ואפשר לזרוק פנימה שקיקים עם כשות, תבלינים, וכו. בזמן שחיכינו החלטנו לאפות את הבאץ השני בתנור. אבל על כך בפוסט הבא
Thursday, June 9, 2011
תמונת אולטרה-סאונד
עשיתי דבר מה היום שאולי יסתבר כטעות גדולה, אבל לא יכלתי להתאפק...
מזה כמה ימים שאני מוציא דוגמית קטנה של בירה כל יום בכדי לבדוק את הצפיפות. אחרי שאני מציף בה את ההידרומטר (החדש) אני לוקח את הדוגמית, מערבב עם כחצי כפית סוכר, סוגר בצינצת גרבר ריקה (אחרי שאני מרוקן את הדוגמית מהיום הקודם) ושם במקרר כדי לצנן ולגזז. כך יש לי טעימה יומית של הבירה, ואני יכול לעקוב אחריה.
שילשום הוצאתי דוגמית, ואיך שהוא לא הגעתי אליה עד היום בערב. היום כשפתחתי את הצנצנת היא נפתחה ב"פק" גזי ומשכנע מאוד. הסתכלתי בה באור, והצבע היה עיברי עמוק ויפיפה, וכשמזגתי אותה לכוס היא אפילו יצרה ראש קצף משכנע מאוד עבור בירה שהיגזזה ליום וחצי.
לא יכלתי להתאפק. אומנם יום הביקבוק של הבירה הזו הוא רק עוד תשעה ימים (וכבר יש אורח לביקבוק ולבישול באותו יום) אבל החלטתי לעשות "תמונת אולטרה-סאנד" של הבירה לפני שהיא "נולדת" באופן רישמי. תפסתי בקבוק נקי, חיטאתי במים רותחים ואלכוהול (כולל הפקק), הספתי כפית שטוחה של סוכר במים חמים, ו...מזגתי. ישר מברז המיכל.
בקבוק ראשון. פקוק. רשום. מוכן.
קבלו אותו:
 יפיוף אמיתי. אבל אני מניח שכל הורה גאה חושב כך על הצאצא... :)
Sunday, June 5, 2011
בשלן נולד
אחרי חודשים של הכנות, שבועות של התעמקות במתכונים, וימים ארוכים של ציפיה, אתמל סוף סוף זה קרה... בישלתי את הבירה הראשונה שלי, וזה היה אדיר!
אתמול בבוקר הייתי אמור לצאת לצלילה, אבל קמתי ממש מוקדם (מי יכול לישון ביום הבישול הראשון?) אז היו לי שעתיים לפני שהייתי צריך לצאת. לא מספיק כדי לבשל, כמובן, אבל די והותר בכדי לנקות ולחטא את הציוד. אז התחלתי ישר בלערבב תמיסת חיטוי בתוך הדלי ולהשרות בה את כל הדברים. מרוב התרגשות שכחתי אפילו לשתות קפה...
האמת היא שמרוב התרגשות לא עלה בדעתי שלשים שפורפרת זכוכית שבירה (כמו הידרומטר) בדלי מלא דברים כבדים (כמו כוס מדידה מפיירקס) ואז לערבל את הדלי טוב טוב כדי שהתמיסה תגיע לכל מקום זה לא הדבר הכי בטוח. בקיצור, שברתי את ההידרומטר על ההתחלה. איזה כיף..
טוב, לפחות לא שברתי את המדחום. אפשר לבשל בלי הידרומטר, אני רק לא אדע מה אחוז האלכוהול בבירה. מעצבן, אבל לא קריטי, במיוחד משום שהבישול הזה הוא (ברובו) מקיט, ואמור להיות בן 6% אלכוהול. אני מוסיף קצת יותר סוכרים, וכו, אז הסבירות היא שזה יהיה טיפה יותר גבוה, אבל כהערכה זה סבבא. יאללה, מבשלים!
שלב ראשון (אחרי שחזרתי מהצלילה, ואכלתי ארוכת צהרים, ופיניתי את האישה מהמטבח באיומים וחרמים) הוא steep ללתת המיוחדת. שלי הגיע בשק מעורבב של כמה סוגי לתת מיוחדת, אז הייתי צריך רק לחמם מים ל68 מעלות, לשים בפנים את השקיקים עם הלתת, ולחכות חצי שעה.

במהלך הsteep חשוב לשמור על טמפרטורה יציבה של הנוזל. השיטה שמצאתי (שעובדת נהדר) היא לכרוך חלק עליון של חליפת צלילה 7ממ מסביב לסיר. החליפה עשויה מניאופרין מבודד, ובהלך החצי שעה אני חושב שאיבדתי בערך מעלה אחת בסך הכול.

אחרי חצי שעה מוציאים את הלתת ומרתיחים. מסתבר שהתנור שלי לא ממש מתלהב מהרעיון של להרתיח 8 ליטר (כן, מסתבר שהסיר שלי קטן משחשבתי) ושהסיכוי שהוא יכול להרתיח באץ מלא הוא די קטן. טוב, ניצתרך לקנות כירה אמיתית בהיזדמנות הראשונה. וגם סיר. בנתיים הלתת רתחה פחות או יותר, ואפשר להוסיף את הרכז:
ולהרתיח...חחחח...כן, כירה טובה...אולי אפילו להביור...

אפשר להגיד משהו טוב על הקיטים של בירדי. הם נותנים לך את ההזדמנות לעבור את כל שלבי הבישול בעצמך. זאת אומרת שבמקום רכז מכושת וחבילת שמרים, הם נותנים לך רכז לא מכושת, כשות, שמרים, ולתת מיוחדת. כך שכאשר התירוש סוף סוף רתח יכלתי להוסיף את הכשות ולצפות בתירוש עולה ומקציף. מתחילים את הסטופר וסופרים שעה בול, כולל הודעות לאישה (שצופה מהספה) בנוסך "עשרים דקות", "חמש דקות", "שתי דקות", "שלושים שניות", "עשר, תשע, שמונה, שבע, שש, חמש, ארבע, שלוש, שתים, אחד, זהו!"
עכשיו קרור. wort chiller עוד אין, אז הבחירה נופלת על אמבט קרח. רק שאין אמבט. מסתבר
שאין לנו פקק לכיור, אז במקום אמבט של מיי קרח, התירוש ישב בקרח בלי מים, מה שלא היה יעיל בכלל לקירור. אחרי זמן מה נפל לי האסימון של להזרים מים על צידי הסיר (לא על המיכסה! על הצדדים) אבל בסופו של דבר לקח לתירוש שעה להגיע לטמפרטורה של 32 מעלות. לא ממש "קריר" אבל סביר. 12 ליטר של מים בדלי ההתססה, מעורבבים היטב כדי להוסיף חמצן, ופנימה זורם התירוש. מוסיפים שמרים שהומסו במים חמימים אה לה פאלמר, ואוטמים. שמים בפינה ומוסיפים איירלוק מלא בוודקה. ומחכים.
ומחכים.
ומחכים.
הקטע הכי מותח בבישות בירה הוא הadaptation. פרק הזמן שלוקח לשמרים להיתארגן בתירוש ולהתחיל להתסיס. פרק הזמן, בקיצור, עד הבועה הראשונה. יושבים, מחכים, מסתכלים באיירלוק. הוא זז קצת? זה רק דמיון שלי או שהנוזל ניראה קצת נמוך בצד אחד וגבוה באחר? הדלי אטום אטום? בטוח?
בסופו של דבר וויתרתי ויצאתי לרוץ.
כשחזרתי האיירלוק ביעבע. כל כך התרגשתי שקראתי לאישה לראות. היא הסתכלה ואמרה "התינוק שלך בועט!" היה בזה משהו. הרגשה מיוחדת של לראות את יציר כפיך מתחיל בחיים משלו. הרגשתי קצת כמו שהרגשתי כשקלטתי בפעם הראשונה שאישתי בהריון. מכאן והלאה החיים יהיו קצת שונים...
אתמול בבוקר הייתי אמור לצאת לצלילה, אבל קמתי ממש מוקדם (מי יכול לישון ביום הבישול הראשון?) אז היו לי שעתיים לפני שהייתי צריך לצאת. לא מספיק כדי לבשל, כמובן, אבל די והותר בכדי לנקות ולחטא את הציוד. אז התחלתי ישר בלערבב תמיסת חיטוי בתוך הדלי ולהשרות בה את כל הדברים. מרוב התרגשות שכחתי אפילו לשתות קפה...
האמת היא שמרוב התרגשות לא עלה בדעתי שלשים שפורפרת זכוכית שבירה (כמו הידרומטר) בדלי מלא דברים כבדים (כמו כוס מדידה מפיירקס) ואז לערבל את הדלי טוב טוב כדי שהתמיסה תגיע לכל מקום זה לא הדבר הכי בטוח. בקיצור, שברתי את ההידרומטר על ההתחלה. איזה כיף..
טוב, לפחות לא שברתי את המדחום. אפשר לבשל בלי הידרומטר, אני רק לא אדע מה אחוז האלכוהול בבירה. מעצבן, אבל לא קריטי, במיוחד משום שהבישול הזה הוא (ברובו) מקיט, ואמור להיות בן 6% אלכוהול. אני מוסיף קצת יותר סוכרים, וכו, אז הסבירות היא שזה יהיה טיפה יותר גבוה, אבל כהערכה זה סבבא. יאללה, מבשלים!
שלב ראשון (אחרי שחזרתי מהצלילה, ואכלתי ארוכת צהרים, ופיניתי את האישה מהמטבח באיומים וחרמים) הוא steep ללתת המיוחדת. שלי הגיע בשק מעורבב של כמה סוגי לתת מיוחדת, אז הייתי צריך רק לחמם מים ל68 מעלות, לשים בפנים את השקיקים עם הלתת, ולחכות חצי שעה.

במהלך הsteep חשוב לשמור על טמפרטורה יציבה של הנוזל. השיטה שמצאתי (שעובדת נהדר) היא לכרוך חלק עליון של חליפת צלילה 7ממ מסביב לסיר. החליפה עשויה מניאופרין מבודד, ובהלך החצי שעה אני חושב שאיבדתי בערך מעלה אחת בסך הכול.

אחרי חצי שעה מוציאים את הלתת ומרתיחים. מסתבר שהתנור שלי לא ממש מתלהב מהרעיון של להרתיח 8 ליטר (כן, מסתבר שהסיר שלי קטן משחשבתי) ושהסיכוי שהוא יכול להרתיח באץ מלא הוא די קטן. טוב, ניצתרך לקנות כירה אמיתית בהיזדמנות הראשונה. וגם סיר. בנתיים הלתת רתחה פחות או יותר, ואפשר להוסיף את הרכז:
ולהרתיח...חחחח...כן, כירה טובה...אולי אפילו להביור...

אפשר להגיד משהו טוב על הקיטים של בירדי. הם נותנים לך את ההזדמנות לעבור את כל שלבי הבישול בעצמך. זאת אומרת שבמקום רכז מכושת וחבילת שמרים, הם נותנים לך רכז לא מכושת, כשות, שמרים, ולתת מיוחדת. כך שכאשר התירוש סוף סוף רתח יכלתי להוסיף את הכשות ולצפות בתירוש עולה ומקציף. מתחילים את הסטופר וסופרים שעה בול, כולל הודעות לאישה (שצופה מהספה) בנוסך "עשרים דקות", "חמש דקות", "שתי דקות", "שלושים שניות", "עשר, תשע, שמונה, שבע, שש, חמש, ארבע, שלוש, שתים, אחד, זהו!"
עכשיו קרור. wort chiller עוד אין, אז הבחירה נופלת על אמבט קרח. רק שאין אמבט. מסתבר

שאין לנו פקק לכיור, אז במקום אמבט של מיי קרח, התירוש ישב בקרח בלי מים, מה שלא היה יעיל בכלל לקירור. אחרי זמן מה נפל לי האסימון של להזרים מים על צידי הסיר (לא על המיכסה! על הצדדים) אבל בסופו של דבר לקח לתירוש שעה להגיע לטמפרטורה של 32 מעלות. לא ממש "קריר" אבל סביר. 12 ליטר של מים בדלי ההתססה, מעורבבים היטב כדי להוסיף חמצן, ופנימה זורם התירוש. מוסיפים שמרים שהומסו במים חמימים אה לה פאלמר, ואוטמים. שמים בפינה ומוסיפים איירלוק מלא בוודקה. ומחכים.
ומחכים.
ומחכים.
הקטע הכי מותח בבישות בירה הוא הadaptation. פרק הזמן שלוקח לשמרים להיתארגן בתירוש ולהתחיל להתסיס. פרק הזמן, בקיצור, עד הבועה הראשונה. יושבים, מחכים, מסתכלים באיירלוק. הוא זז קצת? זה רק דמיון שלי או שהנוזל ניראה קצת נמוך בצד אחד וגבוה באחר? הדלי אטום אטום? בטוח?
בסופו של דבר וויתרתי ויצאתי לרוץ.
כשחזרתי האיירלוק ביעבע. כל כך התרגשתי שקראתי לאישה לראות. היא הסתכלה ואמרה "התינוק שלך בועט!" היה בזה משהו. הרגשה מיוחדת של לראות את יציר כפיך מתחיל בחיים משלו. הרגשתי קצת כמו שהרגשתי כשקלטתי בפעם הראשונה שאישתי בהריון. מכאן והלאה החיים יהיו קצת שונים...
Friday, June 3, 2011
לילה אחרון לפני...
בשעה טובה ומוצלחת הגיע היום הבייתה קיט הבירה החדש שלי, תוצרת בירדי, עם כמה תוספות שלי.
התחלתי עם קיט הבירה המורחב שלהם. בעיקר כי רציתי הידרומטר. אבל באותה נשימה, גם רציתי אופציות להתרחב מהר. אז החלטתי שאני קונה גם מכסה שני ואיירלוק שני, כדי להיות מסוגל לבשל שני באצים בו זמנית (כן, אני יודע שהדלי השני עמור להיות לביקבוק, עוד על זה בעוד רגע.) רציתי גם שק לתת, כי ברור היה לי שבאיזה שהוא שלב אני אגיע לאול גריין. בסך הכול, זה ניראה ככה:
 אומנם זה לא ניראה כמו הרבה מבחוץ, אבל חדי העיין יבחינו בוודאי בשני המיכסים המנוקבים, ובכמה מהדברים היותר גדולים מציצים מאחד הדליים. וכמובן בדף הברו-לוג המושקע שעיצבתי בעצמי, בהשראת דגן מהדובים. האמת היא שזה לא ברו-לוג אמיתי (את זה אני מוציא ישר מבייר-סמיט, ישר מודפס עם המתכון וסדר הפעולות) אבל זה רשימות של דברים שצריך לעשות, תאריכים, וכו, שמשלימים את הדף מביר סמיט ללוג שלם.
אמרתי לפני רגע שרציתי להיות מסוגל לבשל שני באצים במקביל. הרעיון הוא להיות מסוגל לבשל בירה שדורשת פרמנטציה ארוכה, בלי להשבית אותי כליל בינתיים. אבל הרעיון הזה גם מגלם בתוכו בעיה: אם שני הדליים "עסוקים" בתסיסה, איך אני אמור לבקבק?
אז ככה: בשלב מסוים במהלך ההמתנה לקיט, יצא לי לעבור בכפר ערבי לא רחוק מביתי. (יש כאן הרבה, בכול זאת פריפריה..) באחת החנויית בכפר ראיתי מיכלי פלסטיק גדולים עם פקק, וישר צעקתי "זה נהדר לבירה! אפשר להפוך את זה לדלי תסיסה!", ובחדווה רבה קניתי שניים, כשבדימיוני אני כבר רואה שורות שורות, סדורות סדורות, של איילים מכל סוג וצבע, וגם כמה לאגריים, מבעבעים להם בשובה ונחת במחסן ביתי. ( כן, אני יודע שטמפרטורה שמתאימה לאייל לא מתאימה ללאגר. דימיון שלי..)
הקיצר, כשהגעתי הביתה וההיתלהבות פגה קצת הסתכלתי במיכלים שוב, והגעתי למסקנה שבעצם הם לא ממש יהיו דלי תסיסה טובים. כלומר, הם יהיו בסדר, הפקק אוטם יפה, וגם השימוש המקורי (מיכלי חמוצים) טומן בתוכו הבטחה של פלסטיק מתאים למזון. אבלללל.. לא יודע, הרגישו לי קצת זולים בידיים (וגם היו זולים בחנות), וניראה לי שלהפקיד בירה יקרת ערך בידי מיכל פלסטיק זול שאולי ידלוף לה כימיקלים זה לא לעינין. אז ירדתי מזה.
לעומת זאת, מיכל פלסטיק גדול עם ברז מיכל מקורי מבירדיי יהיה אחלה דלי ביקבוק. הבירה לא תישאר בו מספיק זמן בכדי לצבור כימיקלים, והעובדה שהמיכל יעודי אומרת שאני יכול לקדוח חור בפקק שיתאים למקל המילוי שלי, ולהכניס לשם את התירש ממיכל התסיסה כמעט ללא מגע אוויר. גדול! והמיכל השני, מצויד באותו אופן, יכול להכיל בתוכו מיים מורתחים מראש לקירור, עירבוב, ושאר ירקות. בסך הכול, לא קנייה מבוזבזת. אחרי שקדחתי חורים והתקנתי ברזים, זה ניראה ככה:
עכשיו כל מה שנותר זה לקנות מצרכים לבירה עצמה.
במשך השבועיים האחרונים הסתכלתי בעשרות מתכונים, התלבטתי והתחבטתי, העתקתי לביר סמיט ושיניתי מרכיבים, חיפשתי מיזוג מדוייק של טעם, אלכוהול, ורמת אתגר, עד שבסוף,אחרי שעות ארוקות ונדודי שנה קשים, החלטתי על שני מתכונים אני רוצה לנסות.
אז כמובן שהיום בבוקר כשנסעתי לקנות הכול, שכחתי להדפיס את המתכונים ולהביא אותם איתי... אופס
לא שזה כזה משנה. מסתבר שחנות ברידי הפריפריילית שלנו לא ממש מחזיקה בכול הסטוק שרשום באתר. יש שם בעיקר קיטים, שניי קופסאות תרכיז מהסוג הלא נכון (אמבר, אני רציתי פילזנר), ו... גרעינים. זה דווקא יש הרבה, רק שזה טיפה יותר ממה שרציתי לבישול ראשון.
אז בסופו של דבר, קניתי חומרים לשני בישולים:
לבישול הראשון קניתי קיט מוכן של בירדי מסוג אמבר אייל. כולל רכז, לתת מיוחדת, כשות, ושמרים. ערבב וסע. סבבא
לבישול השני קניתי גרעינים. לתת בסיס, לתת מיוחדת, ואפילו קצת לתת חיטה בשביל הקצף. אומנם לא ממש ציפיתי לעבור לאול גריין כל כך מוקדם, אבל האתגר זה חלק מהחוויה, לא? עכשיו אני רק צריך להקריץ מאיפה שהוא סיר יותר גדול (יש לי 18 ליטר, ולא ניראה לי שזה יספיק למשהו כמו 6.5 קג גרעינים) וגם שק גרעינים בגודל של ציפת לכרית. למי שתוהה, אני הולך לנסות BIAB - ניראה לי הכי פשוט.
זהו. יום קשה עבר על כוחותינו. מחר בבוקר יש לי צלילה, ואחר כך... בישול ראשון! (פם פם פם!)
התחלתי עם קיט הבירה המורחב שלהם. בעיקר כי רציתי הידרומטר. אבל באותה נשימה, גם רציתי אופציות להתרחב מהר. אז החלטתי שאני קונה גם מכסה שני ואיירלוק שני, כדי להיות מסוגל לבשל שני באצים בו זמנית (כן, אני יודע שהדלי השני עמור להיות לביקבוק, עוד על זה בעוד רגע.) רציתי גם שק לתת, כי ברור היה לי שבאיזה שהוא שלב אני אגיע לאול גריין. בסך הכול, זה ניראה ככה:
 אומנם זה לא ניראה כמו הרבה מבחוץ, אבל חדי העיין יבחינו בוודאי בשני המיכסים המנוקבים, ובכמה מהדברים היותר גדולים מציצים מאחד הדליים. וכמובן בדף הברו-לוג המושקע שעיצבתי בעצמי, בהשראת דגן מהדובים. האמת היא שזה לא ברו-לוג אמיתי (את זה אני מוציא ישר מבייר-סמיט, ישר מודפס עם המתכון וסדר הפעולות) אבל זה רשימות של דברים שצריך לעשות, תאריכים, וכו, שמשלימים את הדף מביר סמיט ללוג שלם.
אמרתי לפני רגע שרציתי להיות מסוגל לבשל שני באצים במקביל. הרעיון הוא להיות מסוגל לבשל בירה שדורשת פרמנטציה ארוכה, בלי להשבית אותי כליל בינתיים. אבל הרעיון הזה גם מגלם בתוכו בעיה: אם שני הדליים "עסוקים" בתסיסה, איך אני אמור לבקבק?
אז ככה: בשלב מסוים במהלך ההמתנה לקיט, יצא לי לעבור בכפר ערבי לא רחוק מביתי. (יש כאן הרבה, בכול זאת פריפריה..) באחת החנויית בכפר ראיתי מיכלי פלסטיק גדולים עם פקק, וישר צעקתי "זה נהדר לבירה! אפשר להפוך את זה לדלי תסיסה!", ובחדווה רבה קניתי שניים, כשבדימיוני אני כבר רואה שורות שורות, סדורות סדורות, של איילים מכל סוג וצבע, וגם כמה לאגריים, מבעבעים להם בשובה ונחת במחסן ביתי. ( כן, אני יודע שטמפרטורה שמתאימה לאייל לא מתאימה ללאגר. דימיון שלי..)
הקיצר, כשהגעתי הביתה וההיתלהבות פגה קצת הסתכלתי במיכלים שוב, והגעתי למסקנה שבעצם הם לא ממש יהיו דלי תסיסה טובים. כלומר, הם יהיו בסדר, הפקק אוטם יפה, וגם השימוש המקורי (מיכלי חמוצים) טומן בתוכו הבטחה של פלסטיק מתאים למזון. אבלללל.. לא יודע, הרגישו לי קצת זולים בידיים (וגם היו זולים בחנות), וניראה לי שלהפקיד בירה יקרת ערך בידי מיכל פלסטיק זול שאולי ידלוף לה כימיקלים זה לא לעינין. אז ירדתי מזה.
לעומת זאת, מיכל פלסטיק גדול עם ברז מיכל מקורי מבירדיי יהיה אחלה דלי ביקבוק.
 הבירה לא תישאר בו מספיק זמן בכדי לצבור כימיקלים, והעובדה שהמיכל יעודי אומרת שאני יכול לקדוח חור בפקק שיתאים למקל המילוי שלי, ולהכניס לשם את התירש ממיכל התסיסה כמעט ללא מגע אוויר. גדול! והמיכל השני, מצויד באותו אופן, יכול להכיל בתוכו מיים מורתחים מראש לקירור, עירבוב, ושאר ירקות. בסך הכול, לא קנייה מבוזבזת. אחרי שקדחתי חורים והתקנתי ברזים, זה ניראה ככה:
עכשיו כל מה שנותר זה לקנות מצרכים לבירה עצמה.
במשך השבועיים האחרונים הסתכלתי בעשרות מתכונים, התלבטתי והתחבטתי, העתקתי לביר סמיט ושיניתי מרכיבים, חיפשתי מיזוג מדוייק של טעם, אלכוהול, ורמת אתגר, עד שבסוף,אחרי שעות ארוקות ונדודי שנה קשים, החלטתי על שני מתכונים אני רוצה לנסות.
אז כמובן שהיום בבוקר כשנסעתי לקנות הכול, שכחתי להדפיס את המתכונים ולהביא אותם איתי... אופס
לא שזה כזה משנה. מסתבר שחנות ברידי הפריפריילית שלנו לא ממש מחזיקה בכול הסטוק שרשום באתר. יש שם בעיקר קיטים, שניי קופסאות תרכיז מהסוג הלא נכון (אמבר, אני רציתי פילזנר), ו... גרעינים. זה דווקא יש הרבה, רק שזה טיפה יותר ממה שרציתי לבישול ראשון.
אז בסופו של דבר, קניתי חומרים לשני בישולים:
לבישול הראשון קניתי קיט מוכן של בירדי מסוג אמבר אייל. כולל רכז, לתת מיוחדת, כשות, ושמרים. ערבב וסע. סבבא
לבישול השני קניתי גרעינים. לתת בסיס, לתת מיוחדת, ואפילו קצת לתת חיטה בשביל הקצף. אומנם לא ממש ציפיתי לעבור לאול גריין כל כך מוקדם, אבל האתגר זה חלק מהחוויה, לא? עכשיו אני רק צריך להקריץ מאיפה שהוא סיר יותר גדול (יש לי 18 ליטר, ולא ניראה לי שזה יספיק למשהו כמו 6.5 קג גרעינים) וגם שק גרעינים בגודל של ציפת לכרית. למי שתוהה, אני הולך לנסות BIAB - ניראה לי הכי פשוט.
זהו. יום קשה עבר על כוחותינו. מחר בבוקר יש לי צלילה, ואחר כך... בישול ראשון! (פם פם פם!)
Saturday, May 21, 2011
יין אסירים
בתור התחלה ראשונה בעולם הבישול הביתי יין אסירים זו אולי לא הבחירה הכי טובה. אבל מה לעשות, קיט הבירה עוד לא פה, ובנתיים ראיתי את הקישור הזה של קרייגטיוב, ולא יכלתי להתאפק. טיול קצר לטיב טעם (הסופר היחידי שבו אפשר למצוא מיץ פירות וסוכר דקדק בשבת) ואני מוכן.
בעצם, כמעט מוכן. אין לי איירלוק (חסם אויר), וגם אין לי קונדום לא משומן. מה עושים? מאלתרים:
אירלוק הוא בעצם צינור שעליו יושב פקק הפוך המושקע במים. הרעיון הוא שגז שזורם דרך הצינור (פחמן דו חמצני מתהליך התסיסה) יכול לבעבע דרך המים, אבל אויר מבחוץ לא יכול לחדור פנימה. על מנת ליצור איירלוק משלי הייתי זקוק דבר ראשון לצינור פלסטיק. ומצאתי אחד - בתוך בקבוק סבון נוזלי משומש.
לא אלאה כאן אף אחד בתהליך השטיפה המאסיבי שבו השתמשתי כדי לנקות את הצינור הנ"ל. מים רותחים בשפע. חומץ, מלח, אלקוהול מזוקק, וסודה לשתייה כולם עברו דרך הצינור בניסיון להוציא ממנו את טעם הסבון. ההצלחה הייתה חלקית בלבד - רוב הטעם נעלם, אבל היה עדיין מספיק כדי להרגיש. מה לעשות נחיה עם זה. הצינור ממילא לא נוגע בנוזל, אז נקווה שיהיה בסדר.
דבר שני הייתי צריך למצוא דרך לחבר את הצינור, והפקק שעליו (כוסית פלסטיק מבקבוק תרופה נגד שיעול) אל בקבוק המיץ
שלי. דבר שעשיתי ע"י העברת הצינור דרך חור בפקק של בקבוק מים מינרלים:


הרעיון הוא לקדוח חור נוסף דרך פקק בקבוק המיץ ולהשחיל את הצינור דרכו.

בסופו של דבר יצא לי הדבר הזה. דיי מיקצועי, לא?
ה"בישול" עצמו עבר בשקט יחסי. תערובת המזון לשמרים ע"פ קרייג עבדה פיקס (הוא רק שכח להזכיר שהיא גם מריחה טוב)
חיממתי, מעכתי, סיננתי, והוספתי לבקבוק ביחד עם השמרים. נהדר. זה ניראה ככה:


30 גרם שימריי אפיה, עירבוב של כמה דקות, כדי לאחר את השמרים ולהמיס את הסוכר והתוצאה ניראתה מאוד מבטיחה. בקבוק מיץ תפוחים מעורפל ומבעבע, שכבר התחיל לתסוס:

זהו, רק לשים במקום גבוה (בכל זאת שלושה חתולים בבית), לחבר את הפקק, ולחכות שבוע. נכון?
אז זהו שלא.
זוכרים שסיפרתי לכם שלצינור יש קצת טעם של סבון? אז החלטתי לקצץ אותו למינימום כדי שלא יגע בנוזל. אבל קיצצתי קצת יותר מידי.
כתוצאה, הצינור לא הייה מספיק ארוך כדי לתמוך בפקק, וכששמתי בו מים, הם הציפו את הפקק...וחדרו...דרך הצינור בטעם סבון... ישר לתוך היין לעתיד! אני מסתכל בזה במין סלו מושן הזוי כזה. כל המאמץ לנקות הכול ולדאוג שהצינור אפילו לא יגע.. ועכשיו כזה שפריץ ישר... אאאאאוף!
אוף כפול, האמת. כי עכשיו גם אין לי איירלוק. בסופו של דבר התפשרתי על דרך היברידית בין איירלוק לקונדום, וכיסיתי את ראש האיירלוק הלא מתפקד בניילון ניצמד בו חוררתי חור קטן. ניראה לי שזה לא פיתרון אידאלי, ויכול להיות שקצת אויר יחדור בכל זאת, אבל אחרי השפריץ של מיי האיירלוק, אני דיי בטוח שהבקבוק הזה הרוס. אבל בשלב זה לא עולה לי כלום לתת לו לנוח ולראות מה יקרה. בעוד שבוע שבועיים אדוח על התוצאות.
עידכון:
אחרי יומיים-שלושה של ביעבוע ה"יין" הפך להיות דומם באופן חשוד.. ניסיונות החייה בצורת ניעור קל והוספה של מעט מזון שמרים לא הועילו, והנוזל נישאר עכור, בצבע קיא לא סימפטי, ומריח מרחוק כמו לחם רקוב. בהיות התוצאה רחוקה ממה שציפיתי ע"פ הסירטון, ובהיתחשב בפאדיחות ביצור, הגעתי למסקנה שאין לי אומץ לנסות אותו, והבקבוק סיים את חייו בפח, עדיין מלא...
בעצם, כמעט מוכן. אין לי איירלוק (חסם אויר), וגם אין לי קונדום לא משומן. מה עושים? מאלתרים:
אירלוק הוא בעצם צינור שעליו יושב פקק הפוך המושקע במים. הרעיון הוא שגז שזורם דרך הצינור (פחמן דו חמצני מתהליך התסיסה) יכול לבעבע דרך המים, אבל אויר מבחוץ לא יכול לחדור פנימה. על מנת ליצור איירלוק משלי הייתי זקוק דבר ראשון לצינור פלסטיק. ומצאתי אחד - בתוך בקבוק סבון נוזלי משומש.
לא אלאה כאן אף אחד בתהליך השטיפה המאסיבי שבו השתמשתי כדי לנקות את הצינור הנ"ל. מים רותחים בשפע. חומץ, מלח, אלקוהול מזוקק, וסודה לשתייה כולם עברו דרך הצינור בניסיון להוציא ממנו את טעם הסבון. ההצלחה הייתה חלקית בלבד - רוב הטעם נעלם, אבל היה עדיין מספיק כדי להרגיש. מה לעשות נחיה עם זה. הצינור ממילא לא נוגע בנוזל, אז נקווה שיהיה בסדר.
דבר שני הייתי צריך למצוא דרך לחבר את הצינור, והפקק שעליו (כוסית פלסטיק מבקבוק תרופה נגד שיעול) אל בקבוק המיץ
שלי. דבר שעשיתי ע"י העברת הצינור דרך חור בפקק של בקבוק מים מינרלים:


הרעיון הוא לקדוח חור נוסף דרך פקק בקבוק המיץ ולהשחיל את הצינור דרכו.

בסופו של דבר יצא לי הדבר הזה. דיי מיקצועי, לא?
ה"בישול" עצמו עבר בשקט יחסי. תערובת המזון לשמרים ע"פ קרייג עבדה פיקס (הוא רק שכח להזכיר שהיא גם מריחה טוב)
חיממתי, מעכתי, סיננתי, והוספתי לבקבוק ביחד עם השמרים. נהדר. זה ניראה ככה:


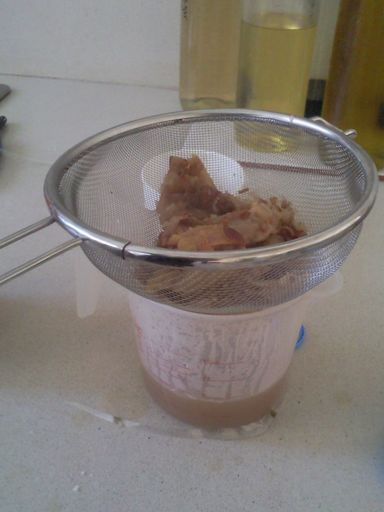
30 גרם שימריי אפיה, עירבוב של כמה דקות, כדי לאחר את השמרים ולהמיס את הסוכר והתוצאה ניראתה מאוד מבטיחה. בקבוק מיץ תפוחים מעורפל ומבעבע, שכבר התחיל לתסוס:

זהו, רק לשים במקום גבוה (בכל זאת שלושה חתולים בבית), לחבר את הפקק, ולחכות שבוע. נכון?
אז זהו שלא.
זוכרים שסיפרתי לכם שלצינור יש קצת טעם של סבון? אז החלטתי לקצץ אותו למינימום כדי שלא יגע בנוזל. אבל קיצצתי קצת יותר מידי.
כתוצאה, הצינור לא הייה מספיק ארוך כדי לתמוך בפקק, וכששמתי בו מים, הם הציפו את הפקק...וחדרו...דרך הצינור בטעם סבון... ישר לתוך היין לעתיד! אני מסתכל בזה במין סלו מושן הזוי כזה. כל המאמץ לנקות הכול ולדאוג שהצינור אפילו לא יגע.. ועכשיו כזה שפריץ ישר... אאאאאוף!
אוף כפול, האמת. כי עכשיו גם אין לי איירלוק. בסופו של דבר התפשרתי על דרך היברידית בין איירלוק לקונדום, וכיסיתי את ראש האיירלוק הלא מתפקד בניילון ניצמד בו חוררתי חור קטן. ניראה לי שזה לא פיתרון אידאלי, ויכול להיות שקצת אויר יחדור בכל זאת, אבל אחרי השפריץ של מיי האיירלוק, אני דיי בטוח שהבקבוק הזה הרוס. אבל בשלב זה לא עולה לי כלום לתת לו לנוח ולראות מה יקרה. בעוד שבוע שבועיים אדוח על התוצאות.
עידכון:
אחרי יומיים-שלושה של ביעבוע ה"יין" הפך להיות דומם באופן חשוד.. ניסיונות החייה בצורת ניעור קל והוספה של מעט מזון שמרים לא הועילו, והנוזל נישאר עכור, בצבע קיא לא סימפטי, ומריח מרחוק כמו לחם רקוב. בהיות התוצאה רחוקה ממה שציפיתי ע"פ הסירטון, ובהיתחשב בפאדיחות ביצור, הגעתי למסקנה שאין לי אומץ לנסות אותו, והבקבוק סיים את חייו בפח, עדיין מלא...
Subscribe to:
Posts (Atom)